Online sales are temporarily suspended !!
Contact the seller in advance before paying for the order!
Have Fun Caning With A Clay Gun

Caning with a clay gun if fun. A clay gun can be used for many things, or rather what comes out of the it. You can extrude snakes in all kinds of shapes, depending on which disc you use. When you purchase a clay gun, You will get several discs included. Makin’s Professional Ultimate Clay Extruder comes with 20 discs and Kemper Klay Guncomes with 19 discs, so both will give you a lot to choose from. In this tutorial however you will use a disc that makes square snakes.
It can be very hard to extrude the clay from the clay gun, so condition it well before feeding the clay into the gun. The Makin's gun has a handle that you can twist to extrude the clay, which will make it easier for you. With the Kempers gun, you have to push the handle into the barrel, which is extremely hard, even with soft clay. I have a Kemper clay gun and use a silicone gun to help pushing the handle into the barrel, which actually works. However if you don't have a clay gun already, I would recommend you to buy the Makin's, as it will make it easier for you.
Caning with a clay gun will make the base color a mud, due to the colors blending when the clay is pressed through the barrel of the clay gun. You will also have pure colors and several colors in banding, like you would get if you made a bulls eye cane from several colors. So what comes out of the clay gun may not be anything like what you wished for. Mostly however the surprises are nice. To avoid too much mud, choose colors with different values, so you get contrasts between dark and light clay.
 If you have made a color box, put color samples next to each other until you find colors that will match and also different values.
So, are you ready to begin? OK! Let's start:
What you need:
- Fimo soft: Windsor blue, Sunflower, Lime green, White, cognac
- Cernit: Bordeaux
- Clay gun/extruder
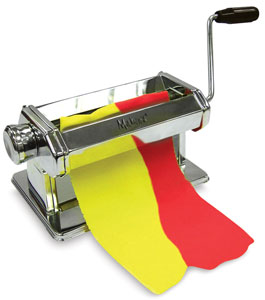
- Pasta machine
- Small round shape cutter proximately the same diameter as the clay gun
- Tissue blades
|
Step 1:
Condition the clays well and make the following color mixes: Dark green: 1 part Windsor blue + 2 parts Sunflower Light green: 1/2 parts Lime green + 4 parts white Red: 2 parts Bordeaux + 2 parts Sunflower + 1 part white Beige: 1 part White + 1/8 part cognac |
 |
Step 2:
Run all the colors through on the thickest setting on the pasta machine. Use the shape cutter and cut out discs of all the colors. Stack them randomly, and roll the stack so that it fits into the clay gun. You will need 3 – 4 stacks to build the cane. Using a square disc in the clay gun, extrude the clay. |
 |
Step 3:
Cut the square snakes into 5 cm lengths. |
 |
Step 4:
Start putting the cane together with the snakes. You can make it as big as you want, square or wide, depending on how many pieces you put together. The one I make here is 5 x 5. Both Fimo soft and Cernit are very soft clays. When your cane is built, reduce it and then stick it in the fridge for 30 minutes. It will then be firm enough to cut slices. It will become soft again fairly quickly though, so you may have to put it back into the fridge every now and then while you work. |
I used this cane for two pendants. You can see how I made them below.

 |
Step 1:
Condition some scrap clay and run it through on the thickest setting on your pasta machine. Use a crafts knife to cut out the shape you want. |
 |
Step 2:
Prepare another scrap clay sheet, and run it through on the thinnest setting. Cut slices from the cane and put them onto the scrap clay sheet. |
 |
Step 3:
Smooth the sides of the scrap clay shapes, so that they are softer and rounded. Put the shapes onto the back of the patterned sheet and cut around it. Turn the shapes over and push the patterned sheet close around the shape. You may have to cut of some excess clay at the back. Condition some black clay, or use one of the colors you have left from making the cane. Run it through the thinnest setting and put the shapes on the sheet, and cut around them. Use a thin mandrel to make a horizontal hole through the top of the pendants, put them on a piece of paper and cure for 30 minutes. When done, give the pendants the surface finish you prefer. I left mine as they were, but added some metal foil flakes on them before curing. |
 |
 And here is a blue variation. You can see it used in a necklace in this tutorial: Blue Breeze Necklace And here is a blue variation. You can see it used in a necklace in this tutorial: Blue Breeze Necklace |
See how you can use this cane in this tutorial:
Make A Bangle With A Tin Can, Clay Gun And Faux Mother Of Pearl Inlay
Return from Have Fun Caning with A Clay Gun to Polymer Clay Tutotorials
Go to Home Page
Contribute with YOUR tutorial
My dream is to make this site the largest and best jewelry making site there is. Where you can find tutorials on every aspect of jewelry making, a real tutorial heaven for crafters around the world.
But, I need your help. Adding only my own tutorials will not give my visitors what they seek, so YOUR tutorial is very valuable not only for me, but for all the people visting this site. With your help, I may achieve my dream, to make this a true tutorial heaven.