Store
The Basics
Tutorials
Read about
Other Stuff
|
Online sales are temporarily suspended !!
Contact the seller in advance before paying for the order!
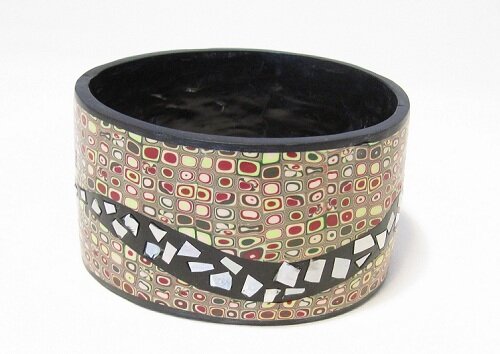
Make A Bangle With A Tin Can, Clay Gun And Faux Mother Of Pearl Inlay
Making a bangle with polymer clay has proven to be a challenging experience. To make them, you need something to wrap the clay around in order to get the inside of the bracelet round. Finding that thing has not been so easy. Someone suggested to use an egg ring. I bought one, but the result was not the best as the egg ring has slanting sides. It was too wide as well, so I had to cut the bracelet after curing and glue it back together.
Searching around for something else to use to shape the bangle with, that was more like the right diameter, I found that a glass jar with Indian Korma sauce was the right size. There was only one flaw, the glass bulged out at the top and at the bottom, making it impossible to pull the bracelet of it after curing, so I abandoned it and tried with a can with carrots and peas instead. It bulged out a little at the top and bottom, but not more than wrapping the center with some paper would fix. So, I wrapped it in paper and started the quest for making the best bangle ever.
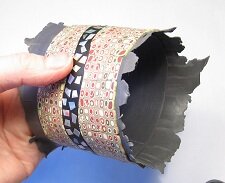
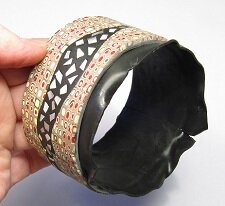
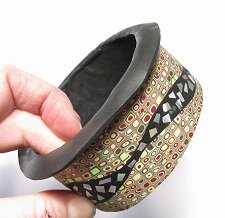
After curing, though, as you will see further down the page, it turned out to be quite difficult to remove the bangle from the can, despite the paper, so I ended cutting it along the joining line and gluing it back together with super glue. It sounds bad, I know, but it actually worked, and gave me the possibility of adjusting the diameter of the bangle. It did not weaken the bracelet, as the whole base cuff was covered with clay on both the inside and the outside.
I have experimented a bit with foil as well in this tutorial, and added it in small bits so that it resembles Mother of pearl inlay. The beautiful foil really comes out great, sparkling with colors like real Mother of pearl.
So, do you want to give it a try? OK! Open your can and pour out the peas and carrots, clean it with soap, and your are ready to go.
What you need to make this bangle:
- Fimo soft: Black, Windsor blue, Sunflower, Lime green, White, cognac
- Cernit: Bordaux
- Tin can with a diameter of proximately 8 cm / 3 inches.
- Metal foil
- Liquid polymer clay
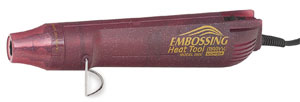
- Heat gun
- Pasta machine
- Tissue blades
- Clay gun with a square disc
- Pair of scissors
- Round shape cutter (proximately the same size as the clay gun)
|
Step 1:
You may not want to use the same colors as I have. If you have a color box, try out different combinations of colors, until you find what you like. To make the pattern work, you need to choose colors with different value, so try to find colors that you can mix into two light and two dark colors. |
 |
Step 2:
If you want to use the same colors as I did, you mix them like this:
- color A: 1 part Windsor blue + 2 parts Sunflower. This color will be dark green.
- Color B: ½ part Lime green + 4 parts White. This will be light green
- Color C: 2 parts Bordeaux + 1 part Sunflower + 1 part White. This will be red-orange.
- Color D: 1 part White + 1/8 Cognac. This will be light beige
|
 |
Step 3:
Run all the mixed colors through the pasta machine on the thickest setting. Use the round shape cutter to cut out several discs from each color. Stack them randomly, and feed the stack into the clay gun.
Step 4:
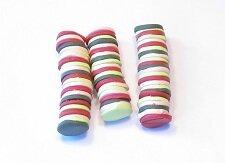
Apply the square disc to the clay gun and press out a long square snake. You may have to fill the clay gun several times and make three or four long snakes.
Step 5:
Cut the square snakes into equal parts. You need 27 pieces to create the cane.
|
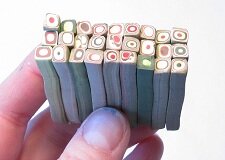 |
Step 6:
Put the parts together into a rectangular cane with 3 x 9 pieces. Reduce the cane, by pinching it lengthwise on your work surface. If your are using Fimo soft, you may have to put it in the fridge for half an hour, for it to be firm enough to hold shape when you slice it.
Step 7:
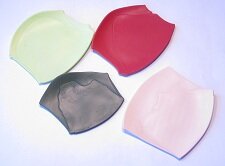
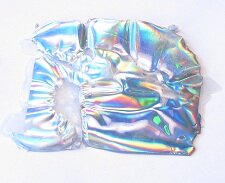
Now you will prepare the foil for the mother of pearl inlay. First pick the foil you want to use. The one I used is holographic Jones Tones. It is kind of metallic silver looking and changes color due to which direction you look at it.
|
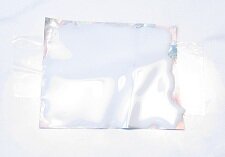 |
Put the foil down with the matte side up. Pour onto it a generous layer of liquid polymer clay. Use a bamboo rod or brush to apply it as evenly as you can. Leave it for 10 minutes, to allow air bubbles to rise to the surface. Cure it in the oven for 20 minutes and then plunge it straight into cold water. This will help clearing up the liquid clay, and cool it enough to be reheated with a clay gun, if it is not clear enough. |
 |
If the layer of liquid clay is very thin and difficult to remove from the Mylar sheet, repeat the procedure. Put it aside until it is cold, or cool it in cold water, and then carefully remove the Mylar sheet. You now have a beautiful foil sheet that you can cut into small pieces with a pair of scissors. |
 |
Step 8:
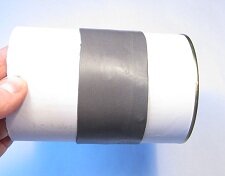
Condition some scrap clay. Run it through on the thinnest setting on your pasta machine. Decide how wide you want your bangle to be, and cut a strip a bit wider than that. Wrap it around the can. This will be the core of the bangle.
Find the middle of the sheet, by measuring from the top and bottom of the can. Make small markings with a pointy tool. This will make it easier for you to apply the patterned sheet. Bake it for 30 minutes.
After curing, hold it under cold water until the clay is stiff. Then cut along the joined line with a crafts knife or a tissue blade. Remove it from the cane and glue it back together with super glue. Put it aside for a while.
|
 |
Step 9:
Condition some scrap clay, and run it through the thinnest setting. Make sure that it is long enough to fit the base you made in step 8. Remove the cane from the fridge and start applying slices on the scrap clay sheet, two rows close together. When done, put a piece of paper on top and roll it smooth with your acrylic roller, and smooth the seams with your finger. (on top of the paper. That way you will not smudge the clay.) |
 |
Step 10:
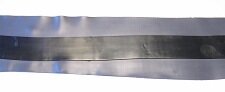
Prepare another scrap clay on the thinnest setting. Run some black clay through on a setting that makes it plus the thin scrap clay sheet as thick as the patterned sheet. Cut a stripe, proximately 3,5 cm wide and long enough to fit the core of the bangle. Put it along the center of the scrap clay strip. |
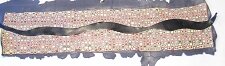 |
Put this sheet on top of the patterned one, but be careful so that you don't press it onto it. You will remove it again in a while. Use a crafts knife and cut a wavy strip from the two sheets. Remove the top sheet, and the wavy strip you have cut from the patterned sheet. Put the black strip there instead and push the three strips close together so that they stick to each other. You now have a sheet of patterned clay with a black wavy strip in the middle. |
 |
Step 11:
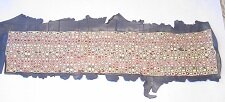
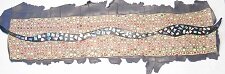
Take the foil sheet and cut thin strips from it. Cut the strips into small pieces and start applying them along the black strip. If the pieces are very small, it may help to use a pair of tweezers. Check each piece before you apply it, so that you put it on with the foil side up, not the transparent clay side. When done, put a piece of paper on top and roll over it with your acrylic roller. This will embed the foil pieces into the clay, so that they will not stand out. |
 |
Step 12:
Apply a thin layer of liquid clay onto the core, and dress it with the patterned sheet. Cut of excess clay along the edge. Cover the seam with some paper and smooth all joints that are not smooth. Put it on a tile and cure it for 30 minutes. When done, hold it under cold water to cool it off quickly, or let it cool on the tile, depending on how patient you are. When cold, sand the edges. |
 |
Step 13:
Run some more black clay through the thinnest setting. Cut a strip a little wider than the bangle. Apply liquid clay on the inside of the bracelet, and apply the black sheet. Smooth it well to avoid trapped air. Cut along each edge with a tissue blade, to remove excess clay. |
 |
Step 14:
Run some black clay through a medium setting. Apply liquid clay on the edges and apply the strips. Make the best fit you can along the inner side, and then cut of the excess clay on the outside. Put the bangle on a piece of paper and cure it for another 30 minutes.
Step 15:
When the bracelet is cured and cooled off, sand it well, but avoid sanding the foil pieces. The foil needs to be varnished, so you can either varnish the strip only, and buff the rest, or you can varnish the whole bangle.
|
Return from Making A Bangle to Polymer Clay Tutorials
Go to Home Page
Leave a comment ,
I would love to hear your opinion on this page. Good or bad, it will help me making this Site better.
|
|
|