Online sales are temporarily suspended !!
Contact the seller in advance before paying for the order!
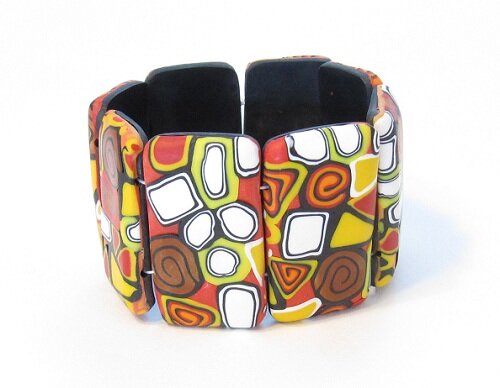
Make A Sunny And Funny Bracelet With The Simplest Of Canes
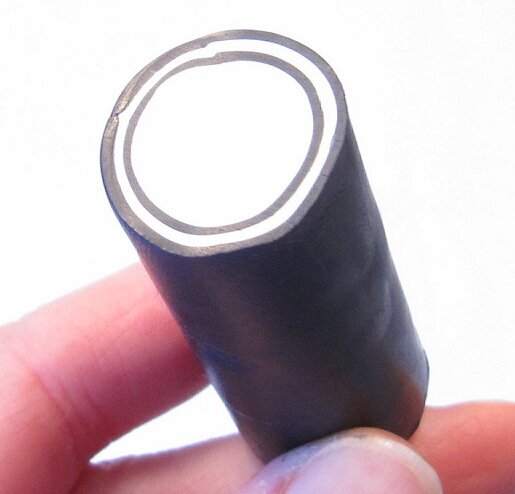
Making this bracelet, you will use very simple canes. Caning is a large part of the art of polymer clay. Canes are often fundamental in other and more advanced techniques, like Kaleidoscope and Millefiori, and it is amazing what you actually can create with the simplest of canes. It may sometimes be boring to make them, but when the result reveal itself along the line, it is totally worth it.
Basically there are not many base canes, you have the bulls eye cane, the jelly roll and the skinner blend cane, and that is pretty much it, unless you count in the snake and the log. It is what you can do with these three basic ones that make the art of polymer clay so fascinating. You can use deviations of each of them, or use them simple as they are and create the most stunning patterns depending on how you put them together. You bend them, squeeze them, reduce them, split them to achieve what you want.
By using different effect clays and color combinations, you can create patterns that look like they are the most advanced there are, and impossible to make. But once you master the simplicity of caning, you know that there are no limits to what you can create with them, and apart of being time consuming to make, it is quite simple to do.
In this bracelet tutorial you will use the simplest of canes, but you will make plenty of them. The magic is not the caning but the coloration, the over all effect of putting different shapes and colors together, to make a bracelet that is delightful to look at. To me this bracelet brings back the feelings of the colorful and patterned wallpapers of the 1970's. The time of flower Power. Let's begin, shall we?
What you need to make this bracelet:
- Fimo soft: Black, White, Sunflower, Cognac, Lemon, Mandarin, X-mast red
- Fimo effect: Gold
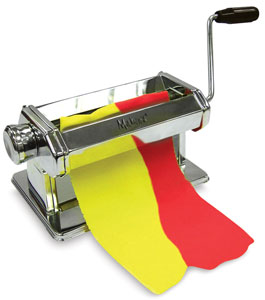
- Pasta machine
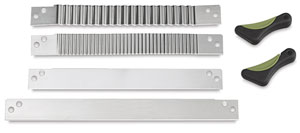
- Tissue blades
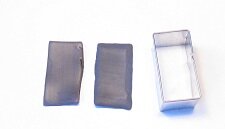
- Rectangular shape cutter
- Crafts knife
- Two thin mandrels or bamboo rods
- Elastic thread
- Super glue
- Collapsing eye needle
Step 1:
Condition the clays well. You will use all the colors as they are in this bracelet, and only mix one color: 1 part X-mast red with 1 part Gold.
 |
Cane 1:
Run the gold clay through the thickest setting on the pasta machine. Run the black sheet through on the thinnest. Put the gold sheet on top of the black sheet. Roll into a jelly roll cane, and reduce it to be about a finger thick. |
 |
Cane 2:
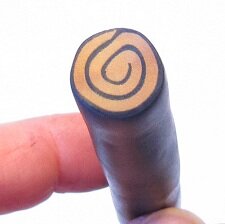
Roll white clay into a log. Wrap it in a thin black sheet, then a thin white sheet and finally in a thin black sheet. Cut it in three pieces. Put two aside and reduce the last to a thin bulls eye cane. |
 |
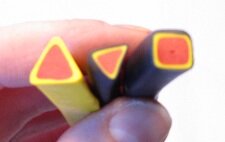
Cane 3 and 4:
Reduce the two parts you put away into thinner canes and shape one square and one rectangular. Cut each in two halves. |
 |
Cane 5 and 6:
Wrap the two halves each in a thin lemon sheet. |
 |
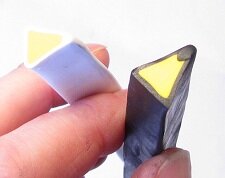
Cane 7, 8 and 9:
Roll some of the red and gold mix you made, into a log. Wrap the log in a medium sheet of sunflower, reduce it and cut it in three pieces. Shape one into a triangular cane and put it aside. Wrap the two remaining pieces in a thin black sheet and shape one into a triangular cane and the other one into a square cane. |
 |
Cane 10, 11 and 12:
Run the red sheet and the Mandarine sheet through on a medium setting. Put them on top of each other. Put them on top of a thin black sheet and roll it into a jelly roll. Cut it in three. Wrap two parts in a medium lemon sheet. Reduce one of them and then shape both into triangular canes. Leave the last cane round. |
 |
Cane 13 and 14:
Roll some Sunflower clay into a log and cut it in two. Wrap one in a medium white sheet and the other in a medium black sheet. Reduce both and shape them into triangles. |
 |
Cane 15 and 16:
Roll some gold clay into a log and cut it in two. Wrap one into a thin red sheet and then a thin black sheet. Wrap the other half in a medium red sheet. Leave the first cane round but shape the last one into a rectangular cane. Put all the canes in the fridge for 30 minutes to make them more firm, and easier to cut into slices. |
 |
Step 2:
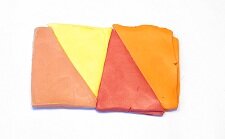
You are now going to make a four color skinner blend. Roll Gold, Lemon, Red mix and Mandarin through the thickest setting. Cut them like you would for a three colored skinner blend, but you do not have to bee too accurate. The sheet will be covered with cane slices, so you just want a graduated base that will shine through here and there.
Blend the colors with your pasta machine until they are nicely blended. Then run it through from Gold to Mandarin too make one long sheet.
|
 |
Step 3:
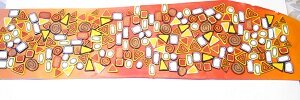
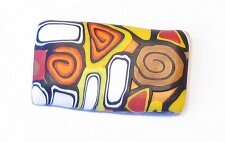
Take the canes from the fridge. Cut lots of slices from each cane and put them on your work surface where you can easy reach them. Put the canes back into the fridge so they don't get soft while you are working with the slices. Start applying the slices onto the Skinner blended sheet. Create your own pattern or just place them randomly as you please. Cut more slices when needed. When the sheet is covered, put a piece of paper on top and roll it smooth with your acrylic roller. |
 |
Step 4:
Condition some scrap clay and finish on the thickest setting. Use the shape cutter to cut out 8 – 10 shapes, depending on how long your bracelet will be. Smooth the sides so that they are rounded and not straight cut. |
 |
Step 5:
Turn the patterned sheet upside down and place the scrap clay slices along it, also upside down. Use the crafts knife to cut around them. Do not cut too close to the scrap clay. You want the patterned sheet to cover the sides of the scrap clay completely. You can cut off excess clay later. |
 |
Step 6:
Turn each piece around and tuck the patterned sheet well around the scrap clay piece. Cut of excess clay if needed.
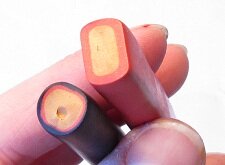
Put them on a thin black sheet, to cover the scrap clay visible underneath. Cut around the shapes with a crafts knife, this time as close you can. Put the pieces on a tile and make two holes in each with the mandrels. When they all have holes, slide them back onto the two mandrels for curing. This will prevent the holes from collapsing during baking.
|
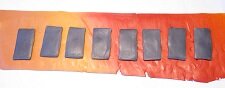
Step 7:
When baked and cold, sand them well if needed. Whether you must sand or not, depend on how smooth and even you managed to make them before baking. If they are bumpy, correct them by sanding, if not, give them the surface finish you prefer.
Sadly I experienced when I sanded mine, that the mica effect in the gold cane and the red clay was sanded away, leaving them a dull red and a dull brown instead. I don't know why this happened. If you experience the same, or have a good solution on how to keep the metal effect, please let me know.
Step 8:
You will now put the pieces together into a bracelet. Use a needle with a collapsing eye to string the beads onto the elastic thread. Make a surgeons knot and add a piece of super glue to it before you cut of the excess thread. Pull the knots into the holes of the nearest bead, and your Sunny and Funny bracelet is done. Put it on and feel the flower power.
If you have leftover canes, save them for a later project, perhaps for a Kaleidoscope bracelet? Remember that when it comes to caning, only the sky is the limit!
Return from Sunny And Funny Bracelet to Polymer Clay Tutotorials
Go to Home Page
Contribute with YOUR tutorial
My dream is to make this site the largest and best jewelry making site there is. Where you can find tutorials on every aspect of jewelry making, a real tutorial heaven for crafters around the world.
But, I need your help. Adding only my own tutorials will not give my visitors what they seek, so YOUR tutorial is very valuable not only for me, but for all the people visting this site. With your help, I may achieve my dream, to make this a true tutorial heaven.