Online sales are temporarily suspended !!
Contact the seller in advance before paying for the order!
Macrame Knots – Part 1 – The Basics
Macrame knots can be both very easy and simple but also very complicated and difficult to make. You can however create very beautiful macrame jewelry using only the simplest basic knots in various combinations, so do not despair.
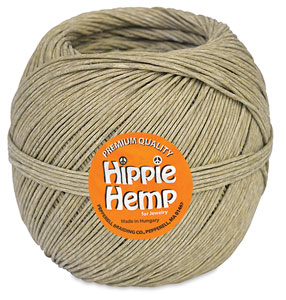
When learning the different knots, I would recommend you to start with a thick cord, like yarn or hemp, and use a light color. The knots are easier to see with light cord than with a dark one. Also practice each knot many times until you know what it is supposed to look like, and how the knot behaves when you are knotting it.
The macrame knots are created by tying knots around a knot bearing cord or anchor cord. There can actually be several knot bearing cords (ACs), like when you make a half knot or a square knot. The knot-bearing cord/s is usually held in position and the other cords are tied around it.
So, let’s begin with the basic knots:
Lark’s head:
This knot you probably know already. It is usually used to mount the cords at the beginning of your work.
 |
Use a knitting needle or something similar to tie the lark’s head knots onto. Fold the cord in two and bring the folded side around the knitting needle and pull the cord through the loop and that is it. |
Half Knot:
This too is a very familiar knot. The difference is that you tie it around two knot-bearing cords.
 |
Start by pulling the right side cord across the two middle cords (the knot bearers) and under the left side cord. |
 |
Pull the left side cord under the knot bearers and over the right side cord. Pull the right- and left cords tight around the knot bearers, and that is it. |
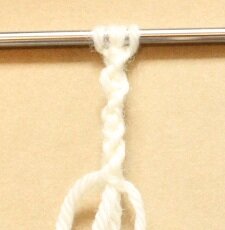 |
When you tie several Half knots the pattern will create a spiral. |
Square knot:
|
Start by making a Half knot. |
 |
Pull the right hand cord under the knot bearers and over the left hand cord. |
 |
Then bring the left side cord over the knot bearers and under the right hand cord. Pull tight and at the same time pull the knot close to the half knot. |
 |
This is how a square knot looks like. |
 |
And this is how several square knots look like. |
Double Half Hitch
 |
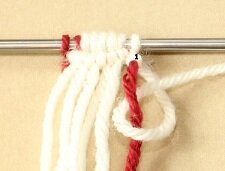
Bring the left cord (red) horizontally in front of the other cords. This will be your knot bearer cord. |
 |
Bring the next cord on your left around the knot bearer, like shown on the photo. Pull the knot bearer back into horizontal position and pull the white knot snugly around it. |
 |
Repeat one more time. On the photo you can see the first knot (marked by 1). |
 |
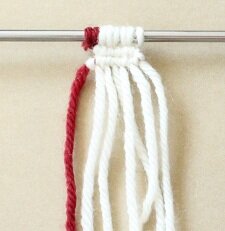
Pull the knot bearer horizontal again and pull the white cord snugly around it. You can see the second knot marked by 2. |
 |
Continue making double half hitches along all the strings. Push the white knots snugly together and pull the knot bearer so that it will not bugle up in between the knots. |
 |
When knotting from right to left, wrap the first right cord around the knot bearer like shown on the photo. You will be familiar with this knot, as it is the same you use when you tie your shoelaces. Pull the knot snugly around the knot bearer like you did previously. |
 |
Repeat one more time and pull the knot into place. (the first knot is marked with 1) |
 |
And this is what it looks like when the two rows are done. |
You can see Horizontal double half hitches used in these tutorials:
Make A Light And Lacy Macrame Bracelet
Macrame Bracelet - Do Magic With Double Half Hitches And Beads
Macrame - Knot Your Way To Beautiful Jewelry
Return to Jewelry Tutorials
Go to Home Page
Contribute with YOUR tutorial
My dream is to make this site the largest and best jewelry making site there is. Where you can find tutorials on every aspect of jewelry making, a real tutorial heaven for crafters around the world.
But, I need your help. Adding only my own tutorials will not give my visitors what they seek, so YOUR tutorial is very valuable not only for me, but for all the people visting this site. With your help, I may achieve my dream, to make this a true tutorial heaven.