Store
The Basics
Tutorials
Read about
Other Stuff
|
Online sales are temporarily suspended !!
Contact the seller in advance before paying for the order!
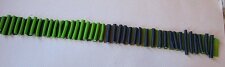
Gay and funny Splash Beads

Making these splash beads was an accident. I actually wanted to make something else, but different circumstances turned what I was doing into these instead. And, I simply just loved them. They look like someone just splashed flowers onto the beads, so I named them Splash beads.
The size of the beads depend on how much you reduce the cane, but I'll come back to that later. Are you ready to begin? OK!
What you need:
I use Fimo soft, but you can use any kind of clay.
- Polymer clay in Cognac, Apple green, Windsor Blue and White
- Tissue blades one firm and one soft
- Bamboo rods
- Baby wipes
- Pasta Machine
- Liquid Polymer clay
- Heat gun
 |
 |
Step 1:
Condition your clay well. You are now going to make a carrot Skinner blend. Roll Cognac clay into a carrot shaped log. Do the same with Apple green and The Windsor blue. Put the carrots next to each other thick end to thin end, with the Cognac carrot in the middle. Flatten them and run them through the pasta machine. Fold in two and run through again. Continue until you have blended the colors nicely. |
Step 2:
Roll the blended strip into a log. Compress the log into a plug. Flatten the plug and run it through the pasta machine with the green side first. Start with the thickest setting, then a medium setting. You will now have a long strip green in one end, and blue in the other. Put it aside. |
 |
 |
Step 3:
Roll some white clay into a thin log. Cut it in two. Wrap one part in blue clay and the other in green clay. Start with the green log, and roll it into a long thin snake. Cut pieces as long as the Skinner blend strip is wide. Place the snakes on the blue side of the blended strip and towards the middle.
Repeat with the blue snake, and place them on the green side of the strip. |
|
 |
 |
Step 4:
Roll the strip with the snakes into a thick cane. Start on the blue side. |
Step 5:
Now you need to reduce the cane. Squeeze the middle part of the cane, and then work your way downwards. Place the bottom side of the cane on your work surface. Pinch and squeeze the cane from center and down to the bottom, until it is of even thickness. Turn the cane upside down, and repeat the procedure on the other half. This way you will not loose so much of the cane during the reduction. |
 |
 |
| When the cane get thinner, you will have to reduce it the regular way, or it will bend over constantly. How much you want to reduce the cane depends on how large beads you want to make. I reduced mine to proximately 2 cm in diameter. |
Step 6:
With a ruler, mark every 1 cm along the cane so you get the same size on all your beads. Cut of one piece. Use the soft tissue cutter and slice of pieces along the edge of the cane slice, on both sides. |
 |
 |
|
Step 7:
Pinch the misshapen slice into a rounder shape, and roll it perfectly round on your work surface. Pierce it with a bamboo rod and clean it with a baby wipe. Do the same with the rest of the beads, and bake them for 30 minutes. Leave them to cool off.
Step 8:
Glaze the splash beads with liquid polymer clay, or finish them the way you prefer. So, now you know how to make Splash beads. I hope you will enjoy them.
|
Return from Gay And Funny Splash Beads to Polymer Clay Tutorials
Go to Home Page
Contribute with YOUR tutorial
My dream is to make this site the largest and best jewelry making site there is. Where you can find tutorials on every aspect of jewelry making, a real tutorial heaven for crafters around the world.
But, I need your help. Adding only my own tutorials will not give my visitors what they seek, so YOUR tutorial is very valuable not only for me, but for all the people visting this site. With your help, I may achieve my dream, to make this a true tutorial heaven.
|
|
|
