|
Contact the seller in advance before paying for the order! Make Polymer Clay Beads With An Illusion Of Water Colored Confetti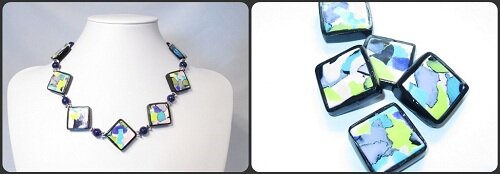
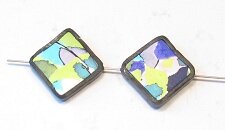
These polymer clay beads give the illusion of being painted with water colors, floating into each other like in a miniature painting. If you use stronger colors than in this tutorial, it will give the illusion of confetti gaily spread onto the polymer clay beads. The technique is simple, but the value of the colors is important in order to get the edges of each of them to show. It looks like water colors with black and/or white inked lines surrounding them. If the colors are too light, the white edges will not show, and if they are too dark the dark edges will disappear. But enough talk, let’s begin. What you need to make these polymer clay beads:
Step 1:
You can read more about mixing polymer clay colors in this tutorial:
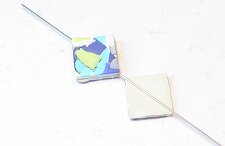
Add some liquid polymer clay along the edge of the polymer clay beads. This will bond the raw clay to the cured clay. Apply one black strip. Start on the middle of one of the sides.
Wrap until you come to the second hole in the bead. Insert the mandrel and push it carefully through so that it exits the hole you have covered with the black strip. Pull it back out and insert it in the hole you just made, but do not push it all the way through. Wrap the black sheet around the rest of the bead. Cut it so that it fits snugly to the beginning of the strip. Push the mandrel all the way through to make the second hole. Repeat with all the polymer clay beads. Tread them all onto a mandrel and cure them for another 30 minutes. Sand the edges so that they are smooth. Sand the top and the back of the beads, but be very careful, only smooth the surface lightly. If you sand too much, you will sand away the thin colors on top of the white and black sheets. Sanded lightly the colors will wear thinner and look like transparent water colors. You can now varnish or buff them as you please, and your polymer clay beads are done.
Return from Water Colored Cofetti Beads to Polymer Clay Tutorials Contribute with YOUR tutorialMy dream is to make this site the largest and best jewelry making site there is. Where you can find tutorials on every aspect of jewelry making, a real tutorial heaven for crafters around the world. |


Faux Surfaces In Polymer Clay
Delphi Glass

The Art Of Polymer Clay
Delphi Glass

The Art Of Jewelry Polymer Clay
Delphi Gkass

Polymer Clay Beads
Delphi Glass

Encyclopedia Of Polymer Clay Techniques
Delphi Glass

Amaco Nublade Polymer Clay Blade
MisterArt

Amaco PolyRoller Polymer Clay Roller
MisterArt
Promote Your Page Too
