Online sales are temporarily suspended !!
Contact the seller in advance before paying for the order!
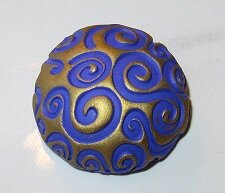
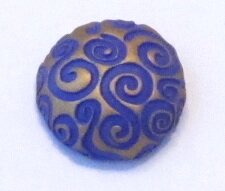
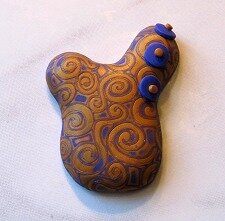
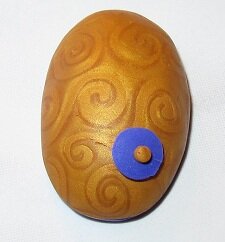
Swirl Beads – One Pattern, Three Techniques

These swirl beads are made with three different techniques, but with the same colors and the same texture sheet. Blue and gold together is always a good combination, and it takes a lot to go wrong when using them.
The mica particles in the gold clay gives a rich, deep shine to the patterns, both in the mica shift bead and the mokume gane bead. The third bead does not have gold clay, but is painted with metallic rub-on wax. If you don't have metallic wax, you can use acrylic paint.
What you need to make these swirl beads:
- Fimo effect clay: gold
- Fimo soft: brilliant blue and plum
- Scrap clay
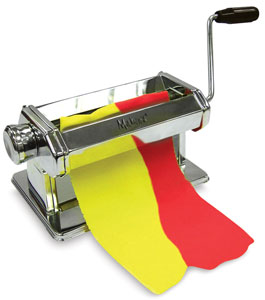
- Pasta machine
- Tissue blades
- Craft knife
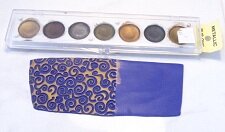
- Texture plate – I have used Studio by Sculpey texture makers, swirl pattern.
- Rub-on wax, gold
- Bamboo rods or thin mandrels
Rub-On Swirl bead:
 |
Step 1:
Condition the clay well. Mix 1 part Brilliant blue + 1 part plum |
 |
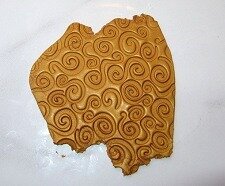
Step 2:
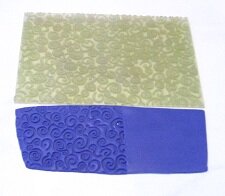
Run the mixed sheet through the pasta machine on a medium setting. Dust it well with cornstarch and press the texture plate onto the sheet to make the print. |
 |
Step 3:
With your finger, apply the rub-on wax to the raised parts of the sheet. |
 |
Step 4:
condition some scrap clay well. Make a round ball, and cut of half. Shape the half into a cabochon shape. |
 |
Step 5:
Apply the textured sheet onto the cabochon and press it carefully around the shape. Try not to smudge the wax onto the lower parts of the pattern. Cut of the excess clay around the bottom of the cab. Run some of the blue sheet through on the thinnest setting and put the cabochon on it. Cut around the edge with a craft knife. Press the sheet well onto the cab. Make a hole horizontally with a bamboo rod or mandrel, and them put it on a piece of paper for curing. If needed apply some more rub-on wax. |
Mokume gane swirl bead:
 |
Step 1:
Mix some more of the blue you made for the first bead. Run it through on the thinnest setting on the pasta machine. Do the same with the gold clay. Put the gold sheet on top of the blue. Run them through on the thinnest setting. Cut it in two and put the parts on top of each other. Repeat one more time. |
 |
Step 2:
Dust the sheet with cornstarch and press the texture sheet onto it. Use a soft tissue blade and shave off the raised parts. |
 |
Step 3:
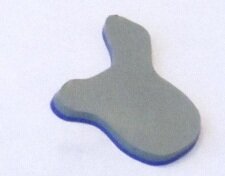
Run some scrap clay through on the thickest setting. Put it on top of a blue sheet. With your crafts knife, cut out a shape. Use your finger to smooth the edges so that they are rounded. |
 |
Step 4:
Apply the mokume gane sheet on top of it. Cut of the excess clay. Use a small round shape cutter and cut out three disks from the blue sheet. Apply them onto the bead. Use the top of a pen, and cut out three small discs from the gold sheet, and apply them onto the blue discs. |
|
Step 5:
Make a hole horizontally with a bamboo rod or mandrel, and put it on a piece of paper for curing. |
Mica shift swirl bead:
 |
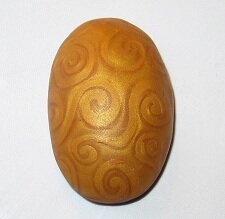
Step 1:
Condition some gold clay. Run it through on a medium setting. Dust the sheet with cornstarch and press the texture sheet onto it. Use a soft tissue blade and shave off the raised parts. Make sure you cut in the same direction. |
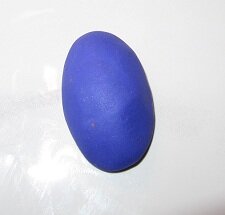 |
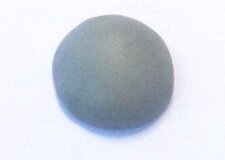
Step 2:
Condition some scrap clay. Make a ball, cut of half and shape it into a cabochon. |
 |
Step 3:
Apply the gold sheet onto the cab and press it firmly around it. Cut of the excess clay and put the cab onto a blue sheet. Cut around the edge with a crafts knife. |
 |
Step 4:
Use a small round shape cutter and cut out one disc. Put it onto the cabochon. Use the top of a pen to cut out a small shape from the god sheet. Apply it on top of the blue disc. Make a hole horizontally in the bead with a bamboo rod or mandrel, and put it onto a piece of paper for curing. |
Cure the beads for 30 minutes.
The Rub-on swirl bead needs to be varnished or glazed, so that the rub-on wax won't smudge. If you choose to glaze it with liquid polymer clay, you need to fill the groves first, in order to get a smooth surface.
You can do that by applying the liquid clay with a small brush or a bamboo rod. Because the bead is not flat, you must take one swirl at the time, and quickly heat it with a heat gun to set the liquid clay so that it won't run. When the groves are filled, do the raised parts carefully. The rub-on wax will smear, so apply the first layer only on the golden parts. Heat until it is clear and than give the whole surface two more coats.
If you don't want a smooth surface, but still want the bead to be shiny, you can first glaze the golden parts, and then the blue parts of the beads with one or two thin coats of liquid clay.
If you want the bead to be matte, apply matte varnish first on the groves, and then do the gold parts.
Give the two other swirl beads the surface finish your prefer or leave them as they are.
Return from Swirl Beads to Polymer Clay Tutorials
Go to Home Page
Contribute with YOUR tutorial
My dream is to make this site the largest and best jewelry making site there is. Where you can find tutorials on every aspect of jewelry making, a real tutorial heaven for crafters around the world.
But, I need your help. Adding only my own tutorials will not give my visitors what they seek, so YOUR tutorial is very valuable not only for me, but for all the people visting this site. With your help, I may achieve my dream, to make this a true tutorial heaven.