Online sales are temporarily suspended !!
Contact the seller in advance before paying for the order!
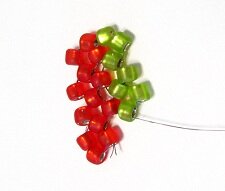
Right Angle Weave
The Most Versatile Beading Stitch Of All

Right angle weave is one of the most exiting and fluid of all beading stitches. It can be done very simple but also very complex, depending on colors, number and the sizes of the beads used. It is a wonderful stitch to use to make beaded jewelry design. It has a long history and originates from several countries, including Russia, Philippines and Japan.
Right angle weave is a very smooth and fluid beading technique, since you bead in circles, first to the right and then to the left and so on. Four and four beads are stitched together in right angle to each other, hence the name right angle weave. Done with very small seed beads, it looks almost like fabric. Increasing and decreasing is easy, and it can therefor be stitched into close to all shapes desired.
You can use any number of beads, but all must be grouped into four, like each side of a square. Using several beads it is also called square netting stitch.
One thing that is important with RAW is that you need to get the tension right. If each bead is passed only once, it may be very loose and floppy. Therefore it is best is to go through them twice.
Right angle weave can be done with two needles, one needle, or no needle. The the two latter is often used to create 3D bead work. Since they require a certain stiffness to stay in shape a solid fishing line is often used when Right angle weave is done without needle. When two needles are used, they are passed through each bead so many times as possible, to achieve the acquired stiffness of the bead work. Swarovski crystals are very popular for creating 3D beaded jewelry design with right angle weave.
The fact that you can use different sized beads and different number of beads in each round and even can sculpt with it, make RAW an immensely popular beading technique. You can create complex patterns fairly easy. It can sometimes cay be a bit confusing, since it have no distinct rows of beads, like most other beading stitches, but, once you've got the hang of it, it opens up for endless possibilities.

Step 1:
Use a comfortable length of thread. Tie the ends together with a surgeons knot, and trim the ends. If you have a thread burner, melt the knot to make it more secure.

Add four beads, go through the loop in the thread and go back up the same bead as you came out from. Cut one end of the thread and continue with a single one. Go through the beads one more time and come out of the bead on the opposite side of the knot.

Step 2:
Add three beads and go through the same bead again. Go through all the four beads one more time and come out of the bead opposite the one you started from. This will be the last bead or the top bead in the rounds you have made to now.

Add another three beads and repeat the whole procedure until you enter the last bead in the new round. Continue adding three and tree beads until you reach the desired length. As you see now, you sew in opposite directions for each round, and come out on the respective right or left side of the last bead in the row.

Step 3:
To make the next row, I will refer to the first row as positioned to the left, and the new one to the right, as this may make it a bit easier. A round means the circle of four beads and a row means the whole chain of beads.

To continue onto the next row, you need to come out of the right bead in the last round you added. Your needle will point down wards. (This does however depend on how long your row is, but in this example it is going down wards)

Add three beads and go through this bead again, and come out the bottom bead of this round. Your needle is now facing away from the left row.

Step 4:
Add two beads (not three as in the previous round). Go through the next right bead from the left row, through the bead your thread comes out of (which is the bottom bead of the previous round) and through the last two beads you added. Your needle is now facing towards the left row.


Step 5:
Go through the next right bead in the left row, add two beads and go through the last/bottom bead from the last round. Go through the bead one more time, until you come out the bottom bead of the round you just made. The needle is now facing away from the left row again.
Continue repeating step 4 and 5 until you reach the end of the row. Flip your bead work so that you are ready to start the next row from the top, coming out of the first right bead of the last row you made. The only difference now, is that you come out this bead down wards not up wards like when you started the previous row.

Repeat all the steps until you have the desired length of your bead work.
If you want to make right angle weave with more beads, let's say three, you string three beads for each single, meaning that you start with 12 beads in the first row, add 9 in the next, and 6 when you do the next row. It may sound confusing, but it is very easy.
Make a beautiful bracelet with RAW from this tutorial.
Return from Right Angle Weave to Beading Instructions
Go to Home Page
Contribute with YOUR tutorial
My dream is to make this site the largest and best jewelry making site there is. Where you can find tutorials on every aspect of jewelry making, a real tutorial heaven for crafters around the world.
But, I need your help. Adding only my own tutorials will not give my visitors what they seek, so YOUR tutorial is very valuable not only for me, but for all the people visting this site. With your help, I may achieve my dream, to make this a true tutorial heaven.
