Store
The Basics
Tutorials
Read about
Other Stuff
|
Online sales are temporarily suspended !!
Contact the seller in advance before paying for the order!
Faux enamel With Liquid Polymer Clay And Mica Powder

Faux enamel made with polymer clay cannot compete with the real enamel, but you can make some pretty good imitations that are very nice to look at. Using clay you can easily make “engravings” on the base, like the Basse-taile enameling technique, and to achieve the glass like look on the faux enamel, you simply use liquid polymer clay.
The challenge is to have the base look as metallic as possible.
You can use metal leaf, but it is very difficult to apply it onto both the raised and the lower parts of the base, and the “engraved” patterns often disappear under the metal leaf, leaving you with a more champlevé like look than Basse taille.
After having tried both metal leaf and paint, I eventually landed on mica powder, as it came out with the best result, and was the easiest of the three to handle.
Getting the base right can be a challenge, as it can be a bit difficult to see the pattern in reverse. You actually have to make a texture plate first and then use that one to print the pattern onto another sheet of clay. The good part is that you can use scrap clay for both the texture plate and for the base. So if you have lots of scrap clay, this is the technique for you.
But, no more talk, let’s start.
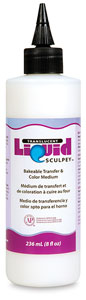
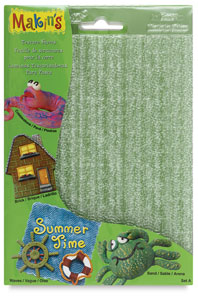
What you need:
 |
Step 1:
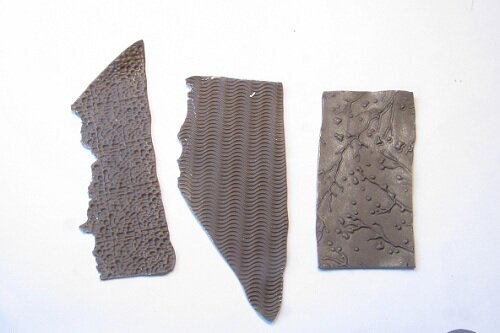
Condition some scrap clay and run it through a medium setting on your pasta machine. Cut the sheet in three and texture them with three different texture plates or stamps, preferably with small patterns. Put them aside. |
 |
Step 2:
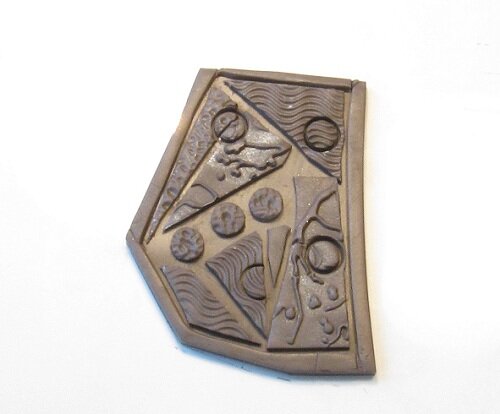
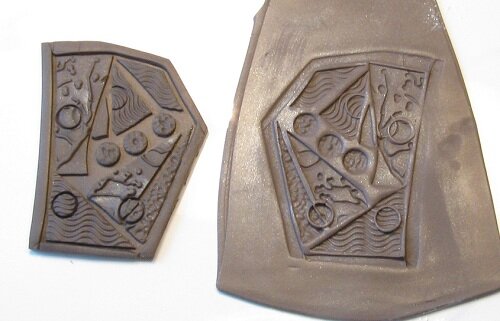
Condition some more scrap clay, and run it through on a medium setting. Cut out the shape you want the pendant to have, but a little larger than what you want the finished piece to be.
Cut pieces of the patterned sheets and apply them onto the shaped sheet. Use shape cutters to make circles or indentations. You are actually making the negative of the pendant, so all the raised parts will be the lower parts on the finished pendant and vice versa. When you are content with the pattern, put some strips around the outer edge of the pendant, so that you will have a raised edge around the finished pendant. You need this to keep the faux enamel in place so that it won’t run over the edge.
When done, cure the negative for 30 minutes.
|
 |
Step 3:
When the negative is cold, condition another sheet of scrap clay and run it through on a medium setting, like you have done above. Dust the sheet with cornstarch and press the negative onto the clay sheet. Clean cut around the edge, close to the raised edge that runs around the pendant. Smoot all rough edges. When you have added the mica powder in the next step, you will not be able to sand it without removing the metallic finish. |
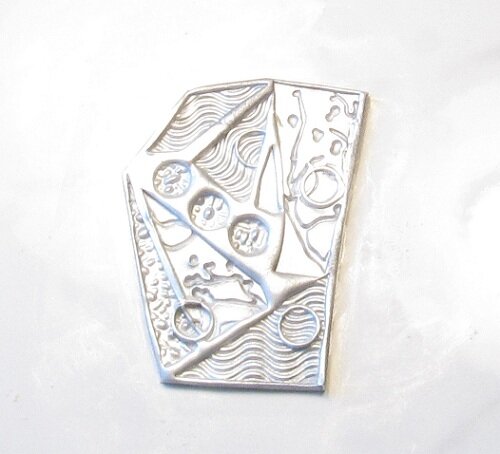 |
Step 4:
Dust the piece with mica powder or pearl ex powder. Silver or pearl will give you a light metallic surface. Cure the piece for 30 minutes and leave it to get cold. |
 |
Step 5:
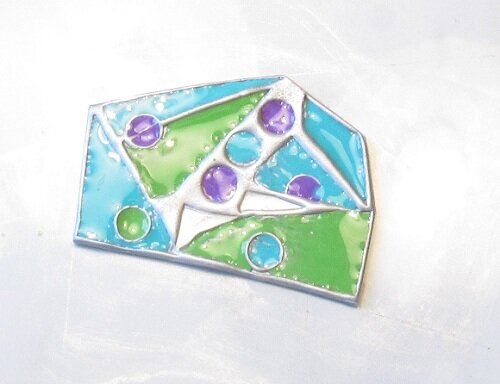
You are now going to add the faux enamel. Pour some liquid polymer clay into a small cup or a paint palette. Add one drop of ink and stir it well. Do the same with the two other inks you have chosen. Use a small paint brush or a bamboo rod and fill the cells in the pendant with inked liquid clay. Do not overfill them. It is better to fill only a little and add more when needed after curing. Leave the pendant for 30 minutes or longer to have trapped air raise to the surface. Bump it on the side a couple of times, to loosen the air bubbles. Cure it for 20 minutes and leave it until it is cold.
When the pendant comes out of the oven, the liquid clay looks frosty. When the pendant is cold, heat it up again with a heat gun to make the faux enamel transparent and shiny.
Repeat step 5 one more time if needed until the cells are even with color. Finish the pendant by pouring a generous layer of liquid polymer clay without ink. This will seal the mica powder on the bridges between the cells and give you an even surface. Cure and reheat as described above. Sand the back and your faux enamel pendant is done.
|
Return from Faux Enamel to Polymer Clay Tutorials
Go to Home Page
Contribute with YOUR tutorial
My dream is to make this site the largest and best jewelry making site there is. Where you can find tutorials on every aspect of jewelry making, a real tutorial heaven for crafters around the world.
But, I need your help. Adding only my own tutorials will not give my visitors what they seek, so YOUR tutorial is very valuable not only for me, but for all the people visting this site. With your help, I may achieve my dream, to make this a true tutorial heaven.
|
|
|